Assembling Berries
Berries are one of the easiest smalls to finish - so, there's no reason to not finish up that little stack of stitched berries languishing in your stash!
This tutorial walks you through the process for assembling the linen berries. The silk gauze berries are assembled in much the same way, although they are more of a fussy finish because of their size. Where there are differences, I will not that in the text.
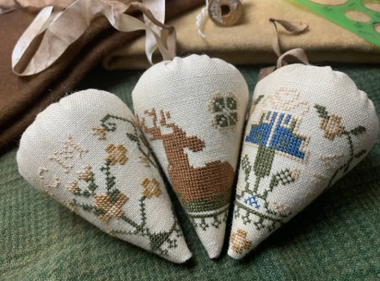
Most of the photos used here are from Charlotte's Berries, a set of three berries based on the Charlotte Mullenger reproduction.
First, supplies for assembling a berry:
-
I do use a sewing machine and you'll want to keep your steam iron ready to go.
-
A rotary cutter, straight edge, and mat are very helpful, but not absolutely necessary.
-
Scissors
-
Fusible interfacing - I use mid to lightweight (featherweights are too light for me)
-
Heavy duty thread - I use a "button and craft" Dual Duty Plus thread by Coats
-
Long sharp needle such as a chenille or milliners needle (versus the tapestry needle you stitch with)
-
Sewing thread to blend with your stitched fabric
-
Templates
-
Marking pen or pencil
-
A bit of yarn - 12-15", I use a 4-ply cotton or wool
-
Turning tool
-
Fiberfill or your favorite fill material
SILK BERRIES NOTE: There is no need for templates or interfacing on the silk berries - the template is 'built-in' and your stitching is enough to stabilize the piece. You may need to straighten and block your stitching somewhat before assembling. Cut all around your stitching to create an even seam allowance of at least 3/8". Skip to step 9 for assembling the silk berry.
Step 1
Ensure your stitching is pressed nice and flat from the back side. Find the center points at the top and bottom by creasing along the vertical center line and snip or otherwise mark the edges of your fabric. Set aside for now.

Step 2
Use the template provided to cut the fusible interfacing. My preferred method is to fold the template in half, place that fold along the folded edge of the interfacing and cut through both layers. I use a straight-edge and rotary cutter for a nice clean edge.

Step 3
Use a marking pen to trace around the curved top edge. Cut along that line through the folded layers.

Step 4
When you open the interfacing you should have a full size fan-shape piece ready to fuse and the folded line or crease will mark the vertical center line. If you prefer to cut from a full-size template, that is absolutely acceptable.

Step 5
Line up the interfacing along the vertical center points and adjust until you are happy with the size and placement. Since the interfacing is translucent, you will be able to see your stitching to assist with the alignment. Fuse in place to the WRONG side of your stitching per the manufacturer's instructions.

Step 6
The templates enclosed in my chartpaks do not have seam allowances - instead, now that the interfacing is fused in place, I use that edge to mark and cut. Line up your straight-edge 1/2" from the edge of the interfacing and trim the linen - this quickly measures and cuts your straight seam allowances.

Step 7
Repeat for the second straight side of the berry. Note: I use the 1/2" seam allowance, but I will trim down a bit more later.

Step 8
Cut the curved top edge of the berry the same 1/2" away from the interfacing. You can mark this or cut it freehand, just don't cut too close. If you need to press everything flat again, this is a good time to do that.

Step 9
Go to your sewing machine now. Fold and pin right sides together, checking to see that any motifs which need to be lined up are placed accurately. Starting at the top of the berry, machine stitch along the edge of the interfacing, down towards the tip of the berry.

Step 10
Stop and backstitch a few stitches just before you get to the end - this allows a bit of ease when you turn the berry.

Step 11
Notice with that one seam, you have created a 'cone'. If necessary, you can hand-stitch this, but I prefer a machine stitch for a smooth and secure seam.

Step 12
Trim the seam allowance down from the 1/2", narrowing it more as you approach the point. Don't cut too close however. I like to press this seam open, using the tip of my iron - at least as much as is possible without creasing the berry itself.

Step 13
Turn the berry right sides out, poking the point of the berry out carefully. Using a long length of the heavy duty thread in your sharp needle, tie a knot at one end and hand baste around the curved top of the berry, starting at the seam. Make your stitches just along the outside edge of the interfacing.
For the silk berries, make this line of basting stitches just outside your stitching in the 'empty' portion of the silk gauze.

Step 14
Take your length of cotton yarn and separate the plies to 'fluff' it a bit. Tuck the bits of yarn into the very tip of the berry and tamp it down so it's firm and the point doesn't want to collapse. The yarn won't pop back so easily and makes a good base for the fiberfill. Add fiberfill (don't forget to fluff it first) until the cone shape won't hold anymore - now is the time to pull those hand gathering stitches.
Do NOT pull the opening closed! Instead, tie off the gathering threads when you have about a 1" opening - enough to get your fingertips in. Next, as you add additional fiberfill to plump the berry, tuck the raw edges of the fabric under to finish that edge.

Step 15
Keep stuffing! These take more fill than you might think and I like to plump the crown of the berry so it's nice and firm. Fill until it's about level at the opening (it doesn't need to be "spilling out").
The same goes for the silk berries, but you won't need as much yarn for the tip and you will be turning under the raw edges of the silk gauze when you fill the berry.

Step 16
You now have nice plump berries ready to go! Don't worry about the opening, you will cover it with a wool cap and your chosen top treatment.

Step 17
This is where you can get very creative - go very simple or take it over the top!
This tutorial won't go into detail on these but rather reviews the basics. I use felted wools, a sharp needle (vs. a tapestry needle), freezer paper, various templates for cutting wool shapes, plus assorted buttons, charms, ribbons, and other trims as you like. Possibilities are endless - dig into your stash!

Step 18
Freezer paper is a must if you want to cut any shapes from wool - this might include flowers, leaves, hearts, etc.

Step 19
Assemble your top treatment as much as possible before attaching it to the berry. Use straight pins to align the top onto the berry - turn it to check from different angles until you are happy with the placement. Use straight pins to hold it in place while you stitch.

Step 20
Using your long sharp needle and thread/floss that matches the wool cap, attach the top treatment to the berry. No need for lots of teeny stitches here - anchor it in place around the cap as needed for the look you want.

All Done!
You are ready to display your work! They look great tucked into all sorts of vignettes, and if you have a grouping, consider that pretty vintage cake plate you've hidden away in a cupboard somewhere.

Summary
And you're finished! If you need to build a bit more confidence, simply make a berry or two from a pretty cotton print or other fabric to practice. Browse the images on the berry design pages here for ideas on the various top treatments I've used on my berries.